
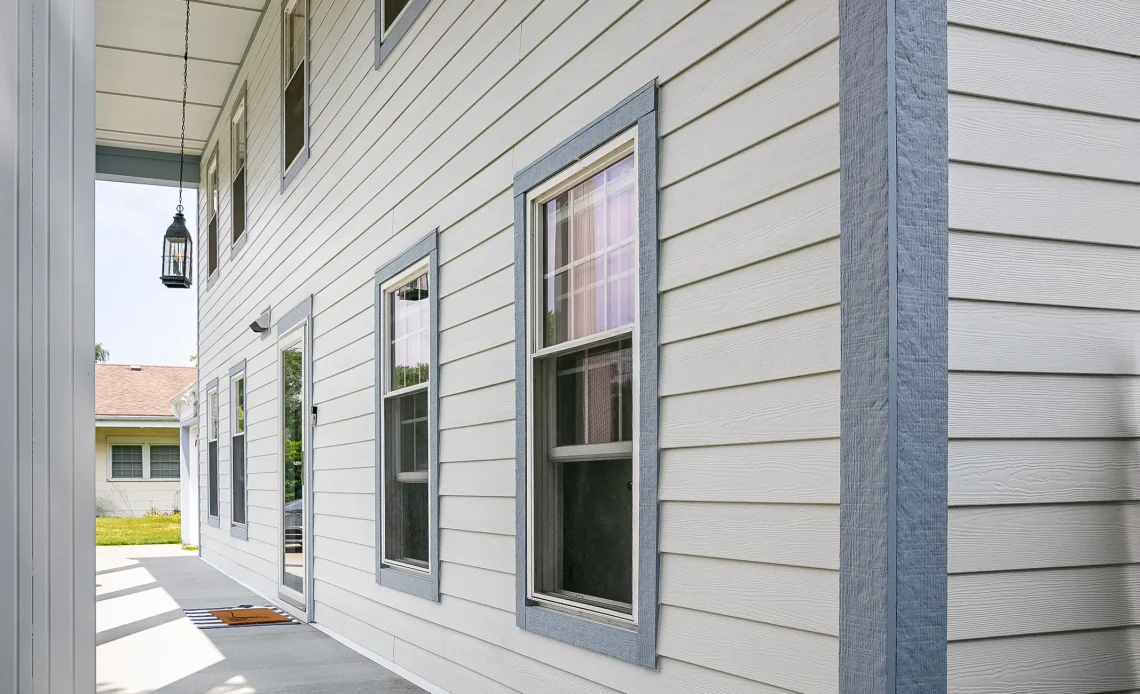
Most homeowners can spot a “nice siding job” from the street, even if they cannot explain why. The secret is rarely the siding panels alone. What separates an average exterior from a high-end one is the craftsmanship around windows and doors. Trim is where the eye naturally goes, and it is also where water tries hardest to get in. When siding installation is planned with trim details in mind, the whole house reads cleaner, sharper, and more intentional.
This article breaks down the trim details that consistently elevate the finished look, plus the practical building-science reasons those details matter. Whether you are a homeowner planning a project or a contractor trying to tighten up your spec, these are the choices that move the needle.
Why trim makes or breaks the “high-end” look
Windows and doors create natural frames on a façade. If the trim lines are straight, proportionate, and consistent, everything looks “designed.” If trim widths are random, caulk joints are uneven, or channels wave, the siding can look cheap even if the materials are premium.
Trim is also the transition zone between different assemblies. Siding meets window flanges. Trim meets sheathing. Flashing meets WRB (weather-resistive barrier). When these intersections are executed well, you get both a crisp appearance and better long-term performance.
1) Consistent trim proportions: pick a system, not a collection
High-end exteriors usually follow a simple rule: trim sizes repeat. That repetition creates rhythm.
What to aim for
- Choose one primary trim width (for example, 3-1/2 inches or 5-1/2 inches) for most window and door casings.
- Use a secondary width for accents only (like a thicker head casing or a band board).
- Keep corner boards, window casings, and door casings visually related. If corner boards are 5-1/2 inches but window trim is 2 inches, the elevation can look unbalanced.
Why it matters
- Consistent proportions hide inevitable irregularities in older walls.
- Repetition makes the house look “intentional,” which reads as higher-end.
Pro tip Before ordering anything, sketch one elevation and note each trim width. If you see more than two or three different sizes, simplify.
2) Deep window returns and “shadow lines” that add dimension
Many budget siding jobs look flat. High-end exteriors have depth. Trim can create that depth with shadow lines.
Details that add depth
- Slightly thicker trim stock than the adjacent siding plane.
- Trim profiles that create a reveal. Even a small step back of 1/4 inch adds a shadow line that looks custom.
- Built-up head trim on windows, especially on larger front elevations.
Why it matters Depth makes façades more visually interesting without adding clutter. It also helps hide minor waviness in older walls.
Common mistake Using thin, purely flat trim everywhere with no reveals. It can make even a clean install feel “builder basic.”
3) The window “head” detail: drip caps are performance and aesthetics
If you want one detail that signals quality, it is a properly handled window head.
High-end window head basics
- Use a rigid drip cap or head flashing at the top of window trim where appropriate.
- Integrate that flashing with the WRB so water sheds outward, not behind the trim.
- Ensure the drip edge projects enough to kick water away from the trim face.
Why it matters Water always runs down. Without a proper head detail, streaking, swelling, and hidden rot are much more likely. A clean head flashing also creates a crisp horizontal line that looks professional.
Aesthetic bonus A straight, consistent drip line across multiple windows creates a subtle “order” to the elevation.
4) J-channel vs. “picture frame” trim: choose a look and commit
Different siding materials and styles use different finishing methods around openings. Two common approaches are J-channel termination and picture-frame trim (often with an integrated receiver or trim accessory).
J-channel termination
- Common with vinyl siding.
- Can look clean when straight and uniform.
- Can look wavy or “thin” if the substrate is uneven or if cuts are sloppy.
Picture-frame trim
- Creates a bold, framed look.
- Often reads more architectural and “finished.”
- Works well when paired with consistent corner boards and band boards.
How to keep it high-end
- If using J-channel, keep it perfectly straight and avoid “snaking” lines. That usually means taking the time to correct wall plane issues before installing the channel.
- If using picture-frame trim, keep miters tight or use clean butt joints with planned reveals, depending on the trim material.
Common mistake Mixing termination styles randomly. For example, J-channel on some windows and wide picture trim on others. Consistency matters more than the method.
5) Trim corners: miter, butt, or wrapped, but do it intentionally
Corners are where trim craftsmanship shows up fast.
Mitered corners
- Look refined when perfect.
- Can open over time with temperature swings, especially on certain composites.
- Require precision cuts and support.
Butt joints
- Often more stable and predictable.
- Can look very clean when the joint placement is consistent (for example, side trim running long with head trim butting into it).
- Easier to seal correctly.
Wrapped trim
- Aluminum coil wrap over wood trim can be a durable option, but it should look crisp. Wrinkles, oil-canning, or messy seams downgrade the appearance quickly.
Best practice Pick a corner strategy and repeat it everywhere. When every window has the same joint logic, the exterior looks “designed,” not improvised.
6) Uniform reveals: small gaps that make a big difference
A reveal is the consistent setback or edge line between two pieces. It sounds minor until you see it done well. High-end exteriors use reveals to create clean geometry.
Where reveals matter
- Between trim and window frames (when applicable).
- Between trim and siding termination.
- Between band boards and siding courses.
How to keep reveals consistent
- Use story poles or simple templates for repeat measurements.
- Mark layout lines before installation.
- Step back and sight along trim lines frequently.
Common mistake “Eyeballing” reveals. The human eye notices inconsistency more than it notices the gap itself.
7) Sill details: make the bottom look as good as the top
The bottom of a window is where water lingers, splash-back happens, and dirt collects. A high-end trim system accounts for that.
High-end sill approaches
- Slightly sloped sill trim or sill nose where appropriate.
- A detail that sheds water forward and does not trap it against the wall.
- Clear termination points so caulk is not doing all the work.
Why it matters Sills that trap water become stain lines. Stain lines make a house look older faster, even if the siding is new.
8) Door trim that looks “built,” not just edged
Doors are focal points. High-end trim around doors tends to have stronger proportion and clearer transitions.
Details that elevate doors
- Wider casings than nearby windows (not always, but often).
- A head casing that aligns with nearby horizontal lines, like band boards or porch elements.
- Clean transitions at the threshold, with materials chosen for wet, high-traffic conditions.
Avoid
- Tiny trim around a prominent front door. It can make the door feel “stuck on.”
- Bulky trim on a minimal modern door style. Match trim language to the architecture.
9) Material selection: stability is part of appearance
A trim system only stays sharp if it stays stable.
Common trim materials and considerations
- PVC trim: very rot-resistant, consistent, and paint-friendly with proper prep. Movement can happen with temperature changes, so fastening and joint detailing matter.
- Fiber cement trim: durable, holds paint well, and looks crisp. Needs correct clearances and fastening.
- Engineered wood trim: stable and paintable, but must be detailed for moisture and edge protection.
- Wrapped wood trim: can be durable when executed cleanly, but the wrap quality is everything.
High-end rule Use trim materials that match the performance demands of the location. High splash zones and sill areas deserve materials that handle moisture without swelling or delaminating.
10) Caulk discipline: less visible caulk usually means better planning
Caulk is not a design feature. High-end trim work uses caulk as a finishing tool, not as a primary waterproofing strategy.
What “high-end caulking” looks like
- Thin, consistent beads, tooled cleanly.
- Joints sized properly so sealant can move without tearing.
- Backer rod used when gaps are larger, rather than filling a deep void with caulk.
Red flags
- Thick caulk lines that try to hide uneven cuts.
- Smears on trim faces.
- Random caulk-only “fixes” at transitions that should be flashed or re-cut.
If you want a simple test, stand 10 feet away. If you can easily see the caulk lines, something upstream likely needed better fit or better flashing design.
11) Alignment with siding courses: the “layout” detail most people miss
Trim does not exist in isolation. It should relate to the siding layout.
High-end layout moves
- Align window heads or sills with horizontal band boards when possible.
- Plan starter height so siding courses land cleanly at window bottoms, minimizing tiny “rip” pieces.
- Keep consistent exposure lines across the elevation.
Why it matters When siding courses break awkwardly around openings, the wall looks choppy. Planning the layout before nailing the first piece of siding is a classic difference between a fast job and a refined one.
A practical “high-end trim” checklist
Use this as a quick spec guide:
- Trim widths repeat across the home with minimal variation
- Head flashing or drip cap details are integrated and consistent
- Corner strategy (miter or butt) is consistent everywhere
- Reveals are uniform and measured, not eyeballed
- Sill details shed water and do not rely on heavy caulk
- Caulk lines are thin, tooled, and only where appropriate
- Siding courses are planned so openings do not create awkward slivers
- Transitions are flashed thoughtfully so trim stays clean over time
The bottom line
If siding is the “skin,” trim is the tailoring. High-end-looking exteriors are not usually about flashy materials or complicated shapes. They are about straight lines, repeatable proportions, clean transitions, and water-shedding details that keep everything looking crisp year after year.
When windows and doors are trimmed with consistency, depth, and smart flashing logic, the whole home looks more custom. And, just as important, it performs better in the places where exteriors most often fail.